Tutorial: The Three Color Rainbow
The Inspiration
It has been a minute since I participated in the Lawnfawnatics challenge. I was especially excited to see that the current challenge is All Things Rainbow. This challenge feels fresh and very spring-like. I couldn’t wait to pull out some of my favorite stamps and stencils from Lawn Fawn and get started.
When I began stamping in 2020, it was the cute designs from Lawn Fawn that lured me in. In fact, they were the very first card making pins I saved to my growing Pinterest board. And yes… many of them were rainbow colored.
ROY G. BIV
Somewhere along the way, I learned about the three-color rainbow technique. I cannot take credit for inventing this technique, but it is my go-to method when I want a beautifully blended rainbow.
Why does it work? First, it relies on basic Color Theory. Second, it works best with liquid ink that blends easily.
There are three primary colors: red, yellow, and blue. When mixed, they create three secondary colors: orange, green, and purple. Additionally, if you choose shade variations like pink instead of red or aqua instead of blue, you will also get softer variations of those secondary colors.

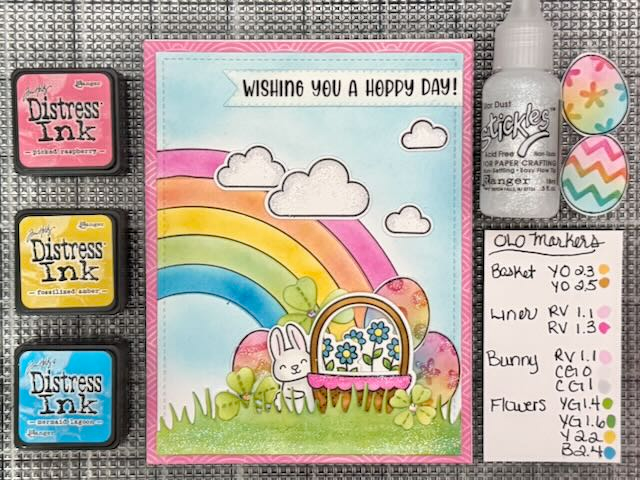
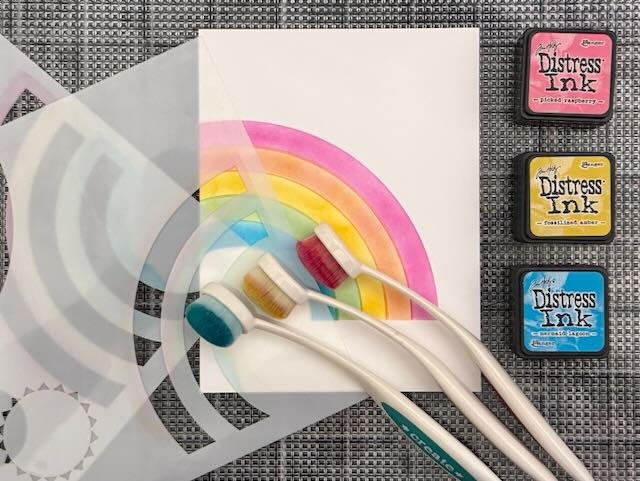
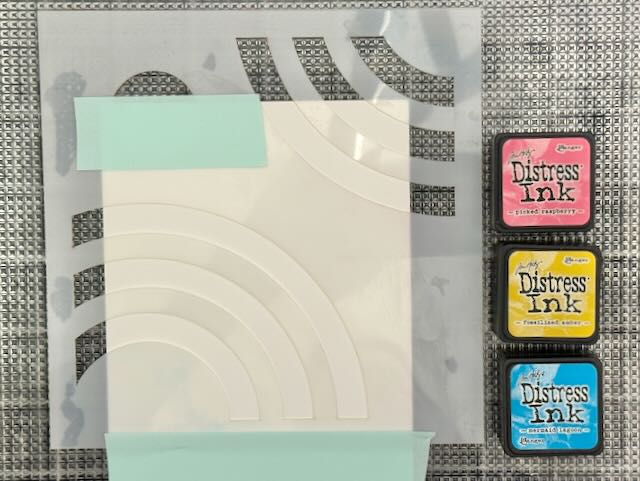
For this card, I chose three colors from the Ranger Ink Distress line: Picked Raspberry, Fossilized Amber, and Mermaid Lagoon. Then, I got to blending the ink through two different Lawn Fawn stencils – the Easter Egg Background stencil and the Corner Rainbow stencils.
Easter Egg Background Stencil
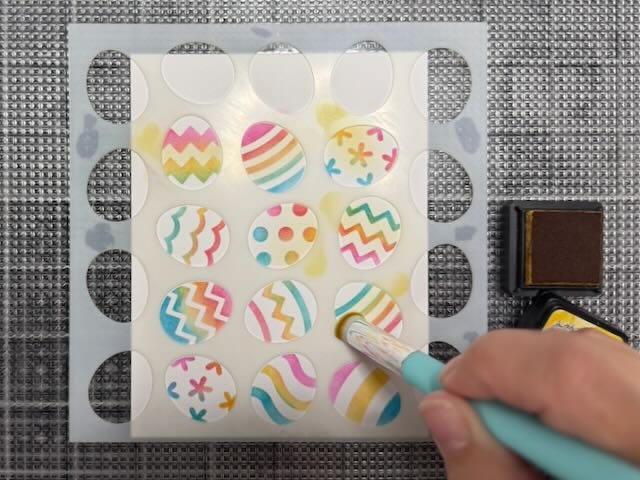
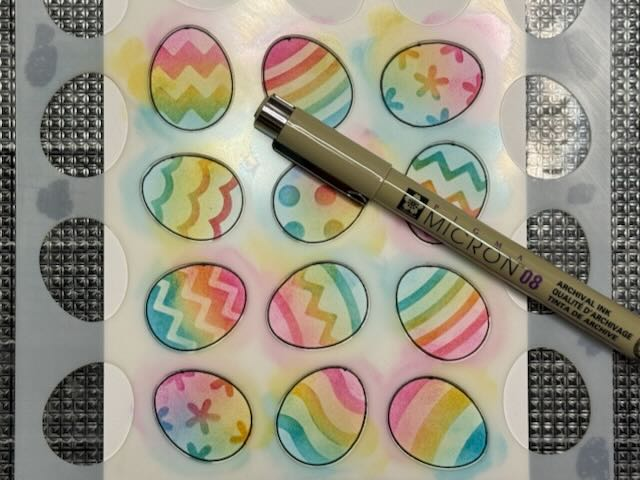

Rather than using this stencil as a full background, I decided to create individual easter eggs. This allowed me to build the scene piece by piece. After blending the three ink colors, I outlined each egg by tracing along the edge of the stencil with a black fine liner pen. Then, I cut out each egg. This extra step really helps the colors pop and keeps the design looking crisp.
Corner Rainbow Stencil
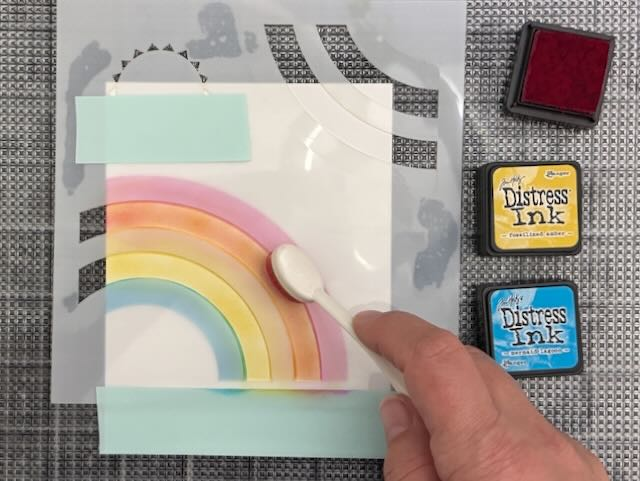
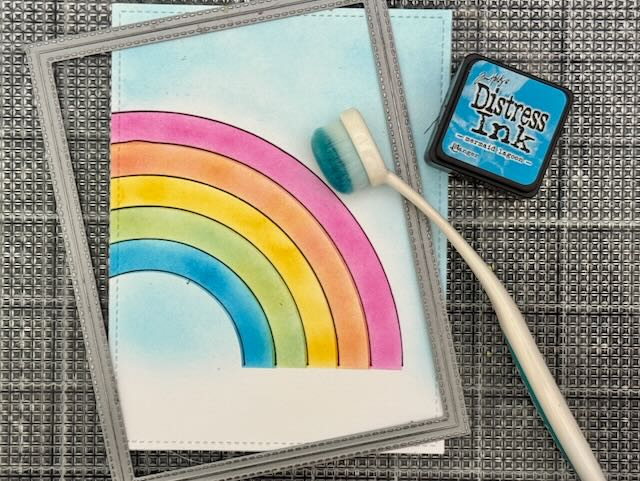
Next, I created the background of the card panel using the Corner Rainbow stencil. I started from the outside edge and worked my way inward. The order was: Picked Raspberry, Picked Raspberry + Fossilized Amber, Fossilized Amber, Fossilized Amber + Mermaid Lagoon, and finally Mermaid Lagoon.
For the blended shades, you can adjust the hue by using more or less of each color. I experimented until I achieved the look I wanted. To tie everything together, I outlined the rainbow with the same black fine liner pen. Then, I added faux stitched look using the largest die in the Outside In Stitched Rectangular Stackables. That small detail frames the panel beautifully.
Coloring the Stamps
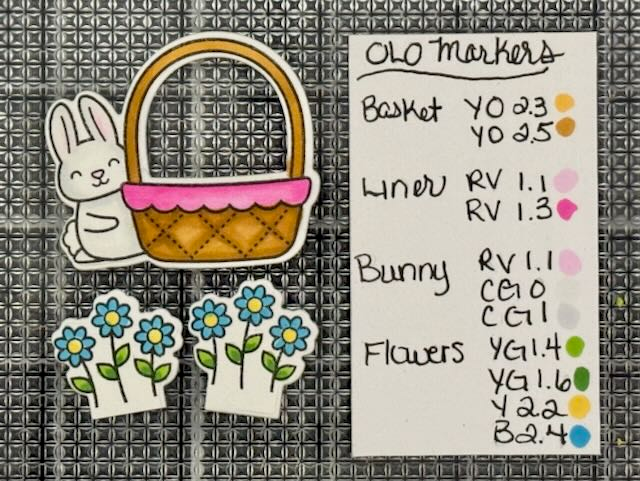
The images were stamped and cut from the Spring Basket stamp set. Then, I colored the stamps using OLO Markers.
Typically, I use a two color blend to create subtle dimension. I used YO 2.3 & YO 2.5 for the basket, RV 1.1 & RV 1.3 for the basket liner, RV 1.1, CG 0 and CG 1 for the bunny, and YG 1.4, YG 1.6, Y 2.2, and B 2.4 for the flowers.
These marker shades coordinate perfectly with colors of the rainbow bringing balance to the entire scene.
The Final Product
To finish the scene, I added grass using Meadow Borders and a few shamrocks from Lucky Clovers. Both were both inked by blending Fossilized Amber and Mermaid Lagoon to keep the color palette cohesive.
The clouds are stamped from the All the Clouds set. Finally, I used Stardust Stickles for shimmer. In my opinion, a rainbow always deserves a little sparkle. There you have it – my take on All Things Rainbow.
